

Pirate
-
Content Count
27 -
Joined
-
Last visited
-
Days Won
2
Posts posted by Pirate
-
-
Hi all,I have modified the Github Python Project "rpi-backlight" to work with the Asus TinkerboardA Python module for controlling power and brightness of the official Raspberry Pi 7" touch display. FeaturesChange the display brightness smoothly or abruptSet the display power on or offToggle the display power on and offGet the current brightnessGet the maximum brightnessGet the display power state (on/off)Command line interfaceGraphical user interfaceRequirementsA TinkerBoard including a correctly assembled 7" touch display v1.1 or higher (look on the display's circuit board to see its version) running a Linux-based OSPython 3.5+Optional: TinkerBoard: gir1.2-gtk-3.0 for the GUI installInstallationClone this repository and install by:
$ sudo apt-get install gir1.2-gtk-3.0
$ git clone http://github.com/p1r473/rpi-backlight.git
$ cd rpi-backlight
$ sudo python3 setup.py install
Usage
API
Example in a Python shell:>>> from rpi_backlight import Backlight >>> >>> backlight = Backlight() >>> backlight.brightness 100 >>> backlight.brightness = 50 >>> backlight.brightness 50 >>> >>> with backlight.fade(duration=1): ... backlight.brightness = 0 ... >>> backlight.fade_duration = 0.5 >>> # subsequent `backlight.brightness = x` will fade 500ms >>> >>> backlight.power True >>> backlight.power = False >>> backlight.power False >>>NOTE: Code using set_ functions of this library has to be run as root, e.g. sudo python file.py , if the permissions for changing the backlight were not changed as described in the installation section!
CLIOpen a terminal and run rpi-backlight as root:$ rpi-backlight -b 100$ rpi-backlight --set-brightness 20 --duration 1.5$ rpi-backlight --get-brightness20$ rpi-backlight --get-poweron$ rpi-backlight -p off$ rpi-backlight --get-poweroff$ rpi-backlight --set-power off :emulator:$ rpi-backlight -p toggle
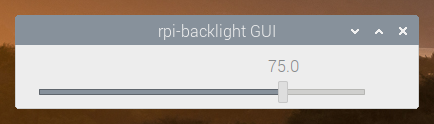
$ rpi-backlight -p toggle -d 1GUIOpen a terminal and run rpi-backlight-gui as root.
Adding a shortcut to the LXDE panel
See docs.Find it at: -
Hi all,I have modified the Github Python Project "rpi-backlight" to work with the Asus TinkerboardA Python module for controlling power and brightness of the official Raspberry Pi 7" touch display.
FeaturesChange the display brightness smoothly or abruptSet the display power on or offToggle the display power on and offGet the current brightnessGet the maximum brightnessGet the display power state (on/off)Command line interfaceGraphical user interfaceRequirementsA TinkerBoard including a correctly assembled 7" touch display v1.1 or higher (look on the display's circuit board to see its version) running a Linux-based OSPython 3.5+Optional: TinkerBoard: gir1.2-gtk-3.0 for the GUI installInstallationClone this repository and install by:$ sudo apt-get install gir1.2-gtk-3.0 $ git clone http://github.com/p1r473/rpi-backlight.git $ cd rpi-backlight $ sudo python3 setup.py installUsage
API
Example in a Python shell:>>> from rpi_backlight import Backlight >>> >>> backlight = Backlight() >>> backlight.brightness 100 >>> backlight.brightness = 50 >>> backlight.brightness 50 >>> >>> with backlight.fade(duration=1): ... backlight.brightness = 0 ... >>> backlight.fade_duration = 0.5 >>> # subsequent `backlight.brightness = x` will fade 500ms >>> >>> backlight.power True >>> backlight.power = False >>> backlight.power False >>>NOTE: Code using set_ functions of this library has to be run as root, e.g. sudo python file.py , if the permissions for changing the backlight were not changed as described in the installation section!
CLIOpen a terminal and run rpi-backlight as root:$ rpi-backlight -b 100$ rpi-backlight --set-brightness 20 --duration 1.5$ rpi-backlight --get-brightness20$ rpi-backlight --get-poweron$ rpi-backlight -p off$ rpi-backlight --get-poweroff$ rpi-backlight --set-power off :emulator:$ rpi-backlight -p toggle
$ rpi-backlight -p toggle -d 1GUIOpen a terminal and run rpi-backlight-gui as root.
Adding a shortcut to the LXDE panel
See docs.Find it at: -
Would love to see Debian 11 so we are not always behind
-
Hi,
So we are not always one step behind in Debian,
Have you thought of releasing image of Debian 11 Bullseye?
We are still using Debian 10 Buster for our images
-
Make sure you plug the camera into the right port
They swapped the camera and screen ports from Tinkerboard -> Tinkerboard 2
-
Was able to fix /boot/ size with GParted partition resize.
Thank you.
-
@Frank3_Wu please consider making /boot/ partition bigger in future releases
Now I am playing with GParted, trying to resize /boot/ partition so I can install wireguard
-
@Frank3_Wu thanks, I was able to install the kernel header successfully
wget https://github.com/TinkerBoard2/kernel/releases/download/tinker_board_2-debian_10-2.0.0/linux-headers-4.4.194_4.4.194-1_arm64.deb
dpkg -i linux-headers-4.4.194_4.4.194-1_arm64.deb
However, it seems /boot/ doesnt have enough disk space
root@Harbormaster:~# apt-get install wireguard
Reading package lists... Done
Building dependency tree
Reading state information... Done
The following additional packages will be installed:
  linux-image-5.10.0-6-cloud-arm64 linux-image-cloud-arm64
Suggested packages:
  linux-doc-5.10 debian-kernel-handbook
Recommended packages:
  firmware-linux-free apparmor
The following NEW packages will be installed:
  linux-image-5.10.0-6-cloud-arm64 linux-image-cloud-arm64 wireguard
0 upgraded, 3 newly installed, 0 to remove and 0 not upgraded.
Need to get 0 B/16.3 MB of archives.
After this operation, 81.1 MB of additional disk space will be used.
Do you want to continue? [Y/n] y
(Reading database ... 100742 files and directories currently installed.)
Preparing to unpack .../linux-image-5.10.0-6-cloud-arm64_5.10.28-1_arm64.deb ...
Unpacking linux-image-5.10.0-6-cloud-arm64 (5.10.28-1) ...
dpkg: error processing archive /var/cache/apt/archives/linux-image-5.10.0-6-cloud-arm64_5.10.28-1_arm64.deb (--unpack):
 cannot copy extracted data for './boot/vmlinuz-5.10.0-6-cloud-arm64' to '/boot/vmlinuz-5.10.0-6-cloud-arm64.dpkg-new': failed to write (No space left on device)
dpkg-deb: error: paste subprocess was killed by signal (Broken pipe)
W: Last kernel image has been removed, so removing the default symlinks
Selecting previously unselected package linux-image-cloud-arm64.
Preparing to unpack .../linux-image-cloud-arm64_5.10.28-1_arm64.deb ...
Unpacking linux-image-cloud-arm64 (5.10.28-1) ...
Selecting previously unselected package wireguard.
Preparing to unpack .../wireguard_1.0.20210223-1_all.deb ...
Unpacking wireguard (1.0.20210223-1) ...
Errors were encountered while processing:
 /var/cache/apt/archives/linux-image-5.10.0-6-cloud-arm64_5.10.28-1_arm64.deb
E: Sub-process /usr/bin/dpkg returned an error code (1)
I checked how much space I have left and its enough
Quoteroot@Harbormaster:~# df -h Filesystem Size Used Avail Use% Mounted on /dev/root 15G 8.1G 5.5G 60% / devtmpfs 972M 8.0K 972M 1% /dev tmpfs 980M 13M 968M 2% /dev/shm tmpfs 980M 25M 956M 3% /run tmpfs 5.0M 0 5.0M 0% /run/lock tmpfs 980M 0 980M 0% /sys/fs/cgroup log2ram 250M 21M 230M 9% /var/log /dev/mmcblk1p7 4.9M 192K 4.5M 5% /boot tmpfs 196M 0 196M 0% /run/user/998 tmpfs 196M 0 196M 0% /run/user/0 tmpfs 196M 8.0K 196M 1% /run/user/1000 -
Can't install openvpn either. Looks like more missing modules.
root@Harbormaster:~# modprobe tun
modprobe: FATAL: Module tun not found in directory /lib/modules/4.4.194
May 6 22:27:00 Harbormaster systemd[1]: Couldn't stat device /dev/net/tun: No such file or directory May 6 22:27:00 Harbormaster systemd[1]: openvpn@server.service: Failed with result 'exit-code'. -
Hi all,
Unable to install WireGuard on TinkerBoard 2 running 2.0.0
I've installed `linux-headers-arm64` but, wireguard doesn't seem to have the required headers in the kernel
root@Harbormaster:~# modprobe wireguard
modprobe: FATAL: Module wireguard not found in directory /lib/modules/4.4.194
root@Harbormaster:~# sudo wg-quick up wg0 [#] ip link add wg0 type wireguard RTNETLINK answers: Operation not supported Unable to access interface: Protocol not supported [#] ip link delete dev wg0 Cannot find device "wg0" root@Harbormaster:~# sudo wg show wg0 Unable to access interface: Protocol not supportedAccording to https://github.com/adrianmihalko/raspberrypiwireguard/issues/11 Wireguard not starting because of wrong kernel-headers
-
I successfully got it working
For anyone else who is wondering, I got it working on SPI5
CS -> SPI5_CSN0
CLK -> SPI5_CLK
DIN->SPI5_TXD
-
 1
1
-
-
Hello,
I am upgrading my 4 digit LED clock to a 8 digit MAX7219
On the 4 segment, was very simple to set up.
SCL -> I2C7_SCL
SDA-> I2C7_SDA
However, my new board has:
CLK DIN CS (It also has DOUT LODA but maybe dont need to use these)
However I can not find these pins in the manual.
For CLK, I have found CLKOUT, I2S0_SCLK, SPI1_CLK, SPI5_CLK but not sure
I found SPI1_CSN0 which maybe is for CS?
Can anyone please tell me which pins required for use with Tinkerboard?
According to some tutorials,
Board Pin Name Remarks RPi Pin RPi Function 1 VCC +5V Power 2 5V0 2 GND Ground 6 GND 3 DIN Data In 19 GPIO 10 (MOSI) 4 CS Chip Select 24 GPIO 8 (SPI CE0) 5 CLK Clock 23 GPIO 11 (SPI CLK) VCC 5V GND GND DIN MOSI CS CE0 CLK SCK -
More progress:
update-alternatives --set ip6tables /usr/sbin/ip6tables-nftNow, errors:
root@linaro-alip:~# ufw enable Command may disrupt existing ssh connections. Proceed with operation (y|n)? y ERROR: problem running ufw-init modprobe: FATAL: Module nf_conntrack_netbios_ns not found in directory /lib/modules/4.4.194 iptables-restore v1.8.2 (legacy): Couldn't load match `limit':No such file or directory Error occurred at line: 63 Try `iptables-restore -h' or 'iptables-restore --help' for more information. iptables-restore v1.8.2 (legacy): unknown option "--log-prefix" Error occurred at line: 24 Try `iptables-restore -h' or 'iptables-restore --help' for more information. ip6tables-restore v1.8.2 (nf_tables): line 22: RULE_APPEND failed (No such file or directory): rule in chain INPUT -
I've made some progress:
I purge ufw and iptables, then install iptables first then change to iptables-legacy.
after that install ufw.
ufw seems to works only on iptables-legacy.apt purge ufw iptables apt install iptables update-alternatives --set iptables /usr/sbin/iptables-legacy update-alternatives --set ip6tables /usr/sbin/ip6tables-legacy apt install ufwnow:
root@linaro-alip:~# ufw allow ssh
ERROR: initcaps
[Errno 2] modprobe: FATAL: Module ip6_tables not found in directory /lib/modules/4.4.194
ip6tables v1.8.2 (legacy): can't initialize ip6tables table `filter': Table does not exist (do you need to insmod?)
Perhaps ip6tables or your kernel needs to be upgraded.
Maybe ip6tables are missing in kernel?
root@linaro-alip:~# sudo modprobe ip6_tables modprobe: FATAL: Module ip6_tables not found in directory /lib/modules/4.4.194 root@linaro-alip:~# ^C root@linaro-alip:~# sudo modprobe ip6tables modprobe: FATAL: Module ip6tables not found in directory /lib/modules/4.4.194-
1
-
-
Perhaps UFW does not work on Debian 10 due to Debian 10 moving from iptables to nftables?
https://serverfault.com/questions/1006981/ufw-replacement-or-workaround-for-debian-10
-
I am also having same issue trying to install UFW
linaro@linaro-alip:/lib/modules/4.4.194$ sudo ufw enable
Command may disrupt existing ssh connections. Proceed with operation (y|n)? y
ERROR: problem running ufw-init
modprobe: FATAL: Module nf_conntrack_netbios_ns not found in directory /lib/modules/4.4.194
I made sure module is enabled:
/etc/default/ufw
IPT_MODULES="nf_conntrack_ftp nf_nat_ftp nf_conntrack_netbios_ns" -
I know the problem. On Tinkerboard 2, they swapped the place of camera and display cord.
Tinkerboard 2 MIPI display port is 22-pin 4 lane, up to 1080p, but RPi's is 15-pin 2 lane. So need a convert cable or RPi's adaptor.
https://uk.rs-online.com/web/p/raspberry-pi/1363742/
or https://www.waveshare.com/cm-dsi-adapter.htm -
Here is document showing now
Pins 3/5 -> I2C bus 6
Pins 27/28 -> I2C bus 7
-
1
-
-
root@linaro-alip:/sys/devices/platform# dmesg | grep ili9 [ 2.017431] tinker-mcu: tinker_mcu_ili9881c_probe: address = 0x36 [ 2.023535] tinker-mcu: tinker_mcu_ili9881c_probe: i2c_id= 0x8 [ 2.075209] tinker-mcu: tinker_mcu_ili9881c_probe: init_cmd_check[-6] failed, 0 root@linaro-alip:/sys/devices/platform# dmesg | grep 5406 [ 6.117044] tinker-ft5406: tinker_ft5406_probe: address = 0x38 [ 6.122899] tinker-ft5406: tinker_ft5406_probe: touch is on DSI-0 [ 6.638485] tinker-ft5406: tinker_ft5406_probe: wait connected timeout -
I have solved this one after hours of hacking away!
It seems in TinkeBoard 2/2S, the I2C bus has been changed from 1, to 6
So, in any I2C controlling code, make sure you change bus from 1 (Tinkerboard) to 6 (Tinkerboard 2)
root@linaro-alip:/home/linaro/Adafruit_LEDBackpack# sudo i2cdetect -y 6 0 1 2 3 4 5 6 7 8 9 a b c d e f 00: -- -- -- -- -- -- -- -- -- -- -- -- -- 10: -- -- -- -- -- -- -- -- -- -- -- -- -- -- -- -- 20: -- -- -- -- -- -- -- -- -- -- -- -- -- -- -- -- 30: -- -- -- -- -- -- -- -- -- -- -- -- -- -- -- -- 40: -- -- -- -- -- -- -- -- -- -- -- -- -- -- -- -- 50: -- -- -- -- -- -- -- -- -- -- -- -- -- -- -- -- 60: -- -- -- -- -- -- -- -- -- -- -- -- -- -- -- -- 70: 70 -- -- -- -- -- -- -- -
Thanks Frank!
-
So far, neither my 7" touchscreen works, nor can I detect anything on I2C...
-
Hi,
Ive upgraded from the Tinkerboard S to the Tinkerboard 2S
My I2C 7 Segment 7 Digit Display doesnt work
I plugged the wires in my 2S the same way as I did for the Tinkerboard S.
However, I am unable to detect any I2C pluugged in.
Ive enabled all the I2C options in tinker-config.
root@Harbormaster:/home/linaro/Adafruit_LEDBackpack# sudo i2cdetect -y 1 0 1 2 3 4 5 6 7 8 9 a b c d e f 00: -- -- -- -- -- -- -- -- -- -- -- -- -- 10: -- -- -- -- -- -- -- -- -- -- -- -- -- -- -- -- 20: -- -- -- -- -- -- -- -- -- -- -- -- -- -- -- -- 30: -- -- -- -- -- -- -- -- -- -- -- -- -- -- -- -- 40: -- -- -- -- -- -- -- -- -- -- -- -- -- -- -- -- 50: -- -- -- -- -- -- -- -- -- -- -- -- -- -- -- -- 60: -- -- -- -- -- -- -- -- -- -- -- -- -- -- -- -- 70: -- -- -- -- -- -- -- -- -
Hi,
The Raspbian official 7" touchscreen doesnt work on the 2S like it did on the TinkerBoard and S
/sys/class/backlight is empty
/sys/devices/platform/ff150000.i2c/i2c-3/3-0045/tinker_mcu_bl doesnt exist like it did on TinkerBoard


How to attach wifi/bluetooth antennae?
in Hardware
Posted
Hello,
How to attach wifi/bluetooth antennae?
Do I need to solder?